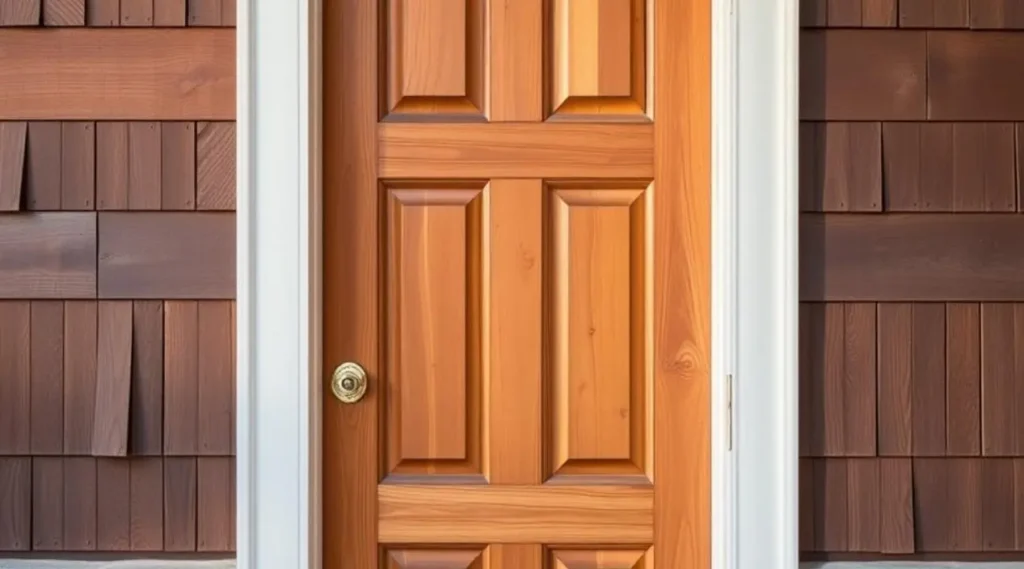
Welcome to our comprehensive Guide to Wood Door Restoration Techniques
In this article, we’ll walk you through everything you need about wood door restoration techniques to bring your wood door back to life. From evaluating its condition to choosing the best finish, our step-by-step guide ensures you’ll achieve professional-quality results. Whether you’re a DIY enthusiast or a seasoned restorer, this guide covers all the essential tools, materials, and wood door restoration techniques to help you succeed.
In the following sections, we’ll delve into:
- Evaluating the condition of your wood door
- Gathering the necessary tools
- Preparing the wood door restoration
- Repairing cracks and holes
- Mastering sanding techniques for a smooth finish
- Deciding whether to paint or stain your door
- Maintenance tips to keep your restored wood door looking beautiful
Let’s get started on this rewarding journey of wood door restoration!
Evaluating the Condition of Your Wood Door Restoration
First Inspection
Before diving right into the repair process, it’s critical to assess the condition of your wood door. This preliminary step helps you recognize the degree of the job needed and the detailed techniques required for remediation. Begin by taking a look at the door for noticeable damage such as cracks, holes, and signs of deterioration.
Identifying Types of Wood Door Damage
During your examination, classify the types of damage you observe. Typical issues consist of:
| Type of Damage | Summary |
|---|---|
| Cracks | Splits in the timber, usually because of age or ecological factors. |
| Holes | Little to big gaps, perhaps from hardware removal or effect. |
| Surface area Wear | General wear, such as scrapes, damages, and scuffs. |
| Water Damage | Stains, swelling, or warping due to moisture exposure. |
| Finish Deterioration | Peeling off, breaking, or fading of paint or tarnish. |
Analyzing Structural Integrity
Next, examine the architectural integrity of the door. Guarantee that the door is still strong and that no substantial weak points could compromise its performance. Pay unique interest to the joints and the framework, as these locations usually bear the brunt of wear and tear.
Evaluating Wood Door Hardware Condition
Evaluate the door’s equipment, including joints, handles, and locks. Figure out if these components are still in great working condition or if they require to be replaced. Equipment in bad condition can impact the door’s procedure and might need focus throughout the repair process.
Recording Your Findings
As you complete your evaluation, document your searching for. Remember and take photos of the damage and areas that require attention. These documents will serve as a reference factor as you move forward with the repair procedure, assisting you to remain organized and focused on the needed jobs.
Necessary Tools and Materials for Wood Door Restoration
Standard Tools
Recovering a wood door calls for a variety of vital devices to make sure an extensive and reliable task. First and foremost, you’ll need a collection of screwdrivers for getting rid of the door from its hinges and detaching any type of hardware. A hammer and nails are likewise necessary for any kind of minor repairs. In addition, a collection of wood knives can be very useful for more elaborate work, such as removing old paint or varnish from detailed carvings. For high-quality doors, consider reaching out to solid wood door companies for additional advice on proper restoration techniques or to purchase replacement materials.
Sanding Equipment
Accomplishing a smooth finish is important in wood door reconstruction. For this, you will certainly require various grades of sandpaper, varying from coarse to fine grit. An electrical sander can save effort and time, particularly for bigger surfaces. Ensure you have a sanding block for hands-on sanding in limited corners and thorough locations.
Loading and Repair Tools
To attend to cracks and openings, you will require a quality timber filler and a collection of putty blades. A timber adhesive is likewise crucial for fixing any type of loose joints or busted pieces. For extra comprehensive repair work, consider having some clamps accessible to hold pieces with each other while the glue dries.
Completing Supplies
Once the door is fixed and fined sand, you’ll require materials for ending up. This consists of wood discolor and sealer to protect and enhance the wood’s all-natural charm. If you choose a painted coating, ensure you have a high-grade primer and paint suitable for timber surfaces. Brushes, rollers, and a paint tray are also necessary for using these coatings evenly.
Cleaning and Safety Gear
Throughout the wood door restoration process, keeping a clean workspace is very important. Keep a vacuum or dirt extractor useful to remove sawdust and particles. In addition, individual safety and security should not be forgotten. Outfit on your own with security goggles, dirt masks, and work gloves to shield against dirt, fumes, and sharp tools.
Optional Tools
While not strictly needed, certain optional devices can make the remediation procedure simpler and more effective. A warmth gun can assist remove old paint or varnish quicker than fining sand alone. A dampness meter can be beneficial in examining the moisture content of the timber, ensuring it is completely dry enough for discoloration or paint.
Having the right devices and materials is important for a successful timber door remediation. By preparing adequately, you can make certain that your reconstruction task runs efficiently and yields professional-quality outcomes.
Preparing the Wood Door Restoration

Getting Rid of the Door from Its Hinges
The initial step in preparing your timber door for reconstruction is to remove it from its hinges. Making use of a hammer and a pin punch, thoroughly touch out the hinge pins. Once the pins are out, lift the door off the hinges and place it on a stable, flat surface such as a sawhorse. This will certainly provide a safe workspace and allow for easier access to all parts of the door.
Cleaning Up the Door Surface
Before any type of remediation job can start, it is essential to extensively clean the door. Make use of a combination of light cleaning agents and water to remove dust, crud, and any kind of old polish or wax. For persistent stains, a mixture of vinegar and water can be reliable. Make certain the door is completely dry before proceeding to the next step.
Stripping Old Finish
To achieve the most effective results, it is often necessary to get rid of the old surface from the door. This can be done using a chemical pole dancer or a warm gun. Use the chemical pole dancer equally across the door’s surface area, complying with the supplier’s guidelines. Enable it to sit for the recommended time before removing the old completed with a putty knife. If utilizing a warm gun, job in tiny areas and beware not to blister the wood.
Inspecting for Damage
When the old finish has been gotten rid of, inspect the door for any damages such as fractures, holes, or deformed areas. Mark these locations for repair work in the next stages of the repair procedure. Identifying and resolving these concerns early will make certain a smoother and extra resilient finish.
Filling Cracks and Holes
Use a top-quality timber filler to attend to any type of splits or holes determined throughout the examination. Apply the filler with a putty knife, guaranteeing it is somewhat overfilled to permit fining sand later on. Allow the filler to completely dry according to the maker’s guidelines.
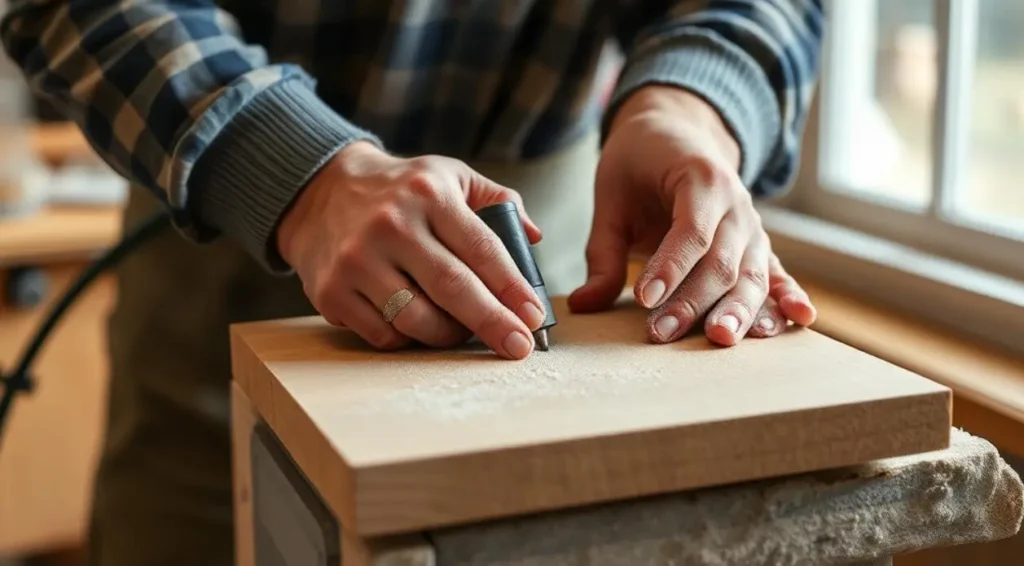
Sanding the Door
After the filler has dried, sand the whole door surface area utilizing medium-grit sandpaper (120-150 grit). This will smooth out the wood filler and any type of remaining rough locations. Adhere to up with a fine-grit sandpaper (220 grit) to accomplish a smooth coating. Always sand towards the timber grain to prevent scratches.
| Step | Tools/Materials Needed |
|---|---|
| Removing the Door | Hammer, Pin Punch, Sawhorses |
| Cleaning up the Door | Mild Detergent, Water, Vinegar (optional) |
| Stripping Old Finish | Chemical Stripper, Heat Gun, Putty Knife |
| Inspecting for Damage | Marker or Chalk |
| Loading Cracks and Holes | Timber Filler, Putty Knife |
| Fining sand the Door | Medium-Grit Sandpaper (120-150), Fine-Grit Sandpaper (220 ) |
Repairing Cracks and Holes in Wood Doors
Identifying the Damage
Before you can start fixing fractures and openings in your timber door, it is essential to assess the degree of the damage. Try to find noticeable splits, dents, or holes and identify whether they are surface or if they pass through deeper right into the wood. This action will aid you in determining the proper repair techniques and materials to utilize.
Cleaning the Damaged Area
Once you have recognized the damaged locations, the following action is to cleanse them completely. Use a soft brush or vacuum cleaner to eliminate any dust, dust, or debris from the fractures and openings. For deeper damage, you may be required to use a tiny choice or needle to ensure the location is completely clean. This is necessary for guaranteeing that the repair service products stick appropriately to the timber.
Selecting the Right Filler
Selecting a suitable filler is vital for a successful repair. For tiny fractures and holes, a top-quality wood filler or putty will be enough. For larger openings or even more extensive damages, you may need to utilize an epoxy-based filler, which provides better stamina and toughness. Ensure the filler you select is suitable for the sort of wood and the finish you prepare to apply.
Applying the Filler
Making use of a putty knife, very carefully apply the filler to the damaged location. Press the filler right into the splits and holes, guaranteeing it loads the space completely. Smooth the surface with the putty blade, eliminating any kind of excess filler. For deeper openings, you may be required to apply the filler in layers, allowing each layer to dry before including the following. Follow the supplier’s instructions for drying times.
Sanding the Repaired Area
Once the filler has dried out completely, the following step is to sand the fixed area till it is smooth and degree with the surrounding timber. Use fine-grit sandpaper and sand in the direction of the wood grain to stay clear of developing scratches. This action is essential for accomplishing a seamless finish that blends with the remainder of the door.
Inspecting the Repair
After fining sand, inspect the fixed location to ensure it is smooth and devoid of any type of imperfections. If needed, apply extra filler and repeat the sanding procedure until the repair is perfect. This focus on detail will certainly guarantee that the repaired area is invisible once the door is refinished.
Fining Sand Techniques for a Smooth Finish
Picking the Right Sandpaper
When it concerns achieving a smooth surface on your wood door, selecting a suitable sandpaper is critical. Sandpaper is available in different grits, each matched for different stages of the fining sand procedure. For initial sanding, use coarse grit (60-80) to eliminate old finishes and harsh spots. Development to medium grit (120-150) for smoothing out the surface area, and finally, utilize a great grit (220-320) to attain a refined coating.
| Sandpaper Grit | Objective |
|---|---|
| 60-80 | Eliminating old finishes and harsh patches |
| 120-150 | Smoothing out the surface |
| 220-320 | Achieving a polished surface |
Hand Sanding vs. Power Sanding
Depending on the problem of your timber door and your individual preference, you may select between hand sanding and power sanding. Hand sanding offers better control, especially for detailed details and sides. On the other hand, power sanding is a lot more efficient for huge, level surfaces and can significantly decrease the time needed for the job.
Sanding Techniques
To guarantee a smooth finish, always sand towards the wood grain. This assists in preventing scratches and guarantees a much more uniform look. Start with the coarse grit sandpaper and gradually relocate to finer grits, wiping away dust with a tack fabric in between each stage. For edges and edges, consider making use of a fining sand block to keep pressure and avoid settling sharp sides.
Taking Care Of Difficult Areas
Some locations of your timber door may require special focus, such as elaborate carvings or deep grooves. For these areas, utilize adaptable fining sand sponges or information sanding devices to reach tight spaces. Perseverance and accuracy are vital to making certain that these areas are as smooth as the rest of the door.
Last Inspection
After finishing the fining sand procedure, do an extensive inspection of the door’s surface. Run your turn over the timber to feel for any kind of harsh places or blemishes that might need added interest. Resolve any kind of continuing to be issued with great grit sandpaper before carrying on to the discoloration or sealing stage.
Discoloration and Sealing Your Wood Door
Selecting the Right Stain
When it concerns staining your wood door, choosing the ideal stain is essential. There are numerous kinds of discolorations readily available, including oil-based, water-based, and gel spots. Each type has its advantages. Oil-based stains penetrate deeply into the timber, giving an abundant shade and durable surface, while water-based discolorations are less complicated to cleanse and have a faster drying time. Gel spots provide much better control throughout the application, making them perfect for vertical surfaces.
Application Techniques
Before applying the tarnish, ensure the door is clean and without any dust or debris. Make use of a tidy towel or a brush to apply the tarnish in the instructions on the wood grain. Apply a thin, also coat and enable it to penetrate the timber for a couple of minutes before rubbing out any type of excess with a tidy fabric. For a much deeper shade, numerous layers can be applied. Constantly permit each coat to dry completely before applying the next.
Sealing the Wood Door
After staining, securing the wood door is important to safeguard it from wetness, UV rays, and day-to-day deterioration. There are several kinds of sealers to pick from, consisting of polyurethane, varnish, and lacquer. Polyurethane is very durable and readily available in both oil-based and water-based solutions. Varnish provides a hard, protective surface and is ideal for outside doors. Lacquer dries promptly and supplies a high-gloss surface, yet it is less resilient than other choices.
Using the Sealer
Use a top-notch brush or a foam applicator to apply the sealer in slim, even coats. Begin on top of the door and work your method down, complying with the direction of the wood grain. Allow each coat to dry completely before using the following. Normally, 2 to three layers suffice for sufficient security. Gently sand the surface with fine-grit sandpaper between coats to ensure a smooth finish.
Final Touches
When the final coat of sealant is dry, examine the door for any kind of blemishes. If essential, lightly sand and use a last layer. Appropriately secured and discolored, your timber door will certainly not only look attractive but also stand up to the components and day-to-day use for years to come.
Painting vs. Staining: Choosing the Best Finish
Recognizing the Differences
When determining between paint and discoloration of your wood door, it’s important to understand the fundamental differences. Paint provides a strong, nontransparent surface that can cover the wood’s all-natural grain, while stain improves and showcases the timber’s natural appeal by penetrating the surface and permitting the grain to show with.
Benefits of Wood Door Painting
Repainting your wood door uses numerous benefits:
| Benefits | Information |
|---|---|
| Color Variety | Paint is available in a comprehensive variety of colors, permitting greater customization. |
| Longevity | A high-grade paint can give a durable surface that secures the wood from moisture and UV damage. |
| Insurance coverage | Paint can cover blemishes and previous coatings, supplying a fresh, uniform look. |
Benefits of Staining
Tarnishing your wood door additionally has its own set of benefits:
| Benefits | Details |
|---|---|
| All-natural Look | Stain improves the natural grain and texture of the timber, providing an extra organic look. |
| Infiltration | Tarnish permeates the wood, providing a more long-lasting surface that is much less likely to peel off or chip. |
| Easy Maintenance | Stained finishes are usually simpler to retouch and preserve gradually. |
Elements to Consider
When selecting between paint and staining, take into consideration the list below elements:
| Factors | Painting | Tarnishing |
|---|---|---|
| Wood Type | Appropriate for all timber types, specifically those with less appealing grain. | Best for woods with lovely, all-natural grain patterns. |
| Ecological Exposure | Better for doors exposed to severe weather condition conditions. | Suitable for doors in even more secured areas. |
| Desired Aesthetic | Supplies a clean, contemporary appearance. | Provides a warm, rustic look. |
Application Techniques
Both paint and staining call for certain application strategies to attain the most effective results:
- Painting: Ensure the door is topped appropriately before using numerous slim layers of paint for an also finish.
- Discoloration: Apply tarnish with a brush or fabric, following the wood grain, and wipe off excess to avoid blotching.
Inevitably, the choice between painting and staining depends on your personal choice, the condition of the timber, and the preferred outcome. Both methods can substantially boost the look and long life of your timber door when done appropriately.
Keeping Your Restored Wood Door
Regular Cleaning
To guarantee your recovered timber door keeps its beauty and resilience, it is vital to take part in routine cleaning. Dust and dust can build up externally, bringing about potential damages gradually. Utilize a soft cloth and a moderate detergent to gently cleanse the door, ensuring you stay clear of extreme chemicals that can remove the finish.
Regular Inspection
Performing regular inspections is important for recognizing any type of very early signs of wear or damage. Examine for any splits, chips, or discoloration. Resolving these issues quickly can stop extra comprehensive damage and preserve the door’s appearance and stability.
Reapplying Finish
Over time, the coating on your wood door may begin to diminish, especially in locations exposed to route sunlight or harsh weather. Reapplying a safety surface, such as a top-quality wood sealant or varnish, every few years can help protect the door’s appearance and shield it from moisture and UV damage.
Lubricating Hardware
Maintaining the performance of your timber door includes more than just caring for the timber. Guarantee that the door’s equipment, such as hinges, locks, and manages, are well-lubricated and working efficiently. Routine lubrication protects against squeaking and guarantees that the door operates easily.
Weatherproofing
To safeguard your brought-back timber door from the aspects, take into consideration including weatherproofing actions. Setting up weatherstripping around the edges of the door can avoid drafts and moisture infiltration, consequently expanding the life of the door. In addition, applying a weather-resistant coating can use added protection against rainfall and sunlight exposure.
Seasonal Adjustments
Wood doors can increase and contract with changes in temperature and moisture. To preserve a proper fit and function, you may be required to make seasonal adjustments. This can involve tightening screws, changing the door framework, or realigning the door to ensure it shuts correctly.
Protective Measures
Implementing protective steps can additionally safeguard your brought-back wood door. As an example, utilizing a doorstop can prevent the door from turning too far and causing damage. Furthermore, placing a floor covering at the entrance can decrease the amount of dirt and dampness tracked onto the door.
Upkeep Schedule
Establishing an upkeep routine can aid you remain on top of the jobs necessary to keep your timber door in pristine problem. Below is a recommended maintenance schedule:
| Task | Frequency |
|---|---|
| Cleansing | Regular monthly |
| Evaluation | Quarterly |
| Reapplying Finish | Every 2-3 Years |
| Lubricating Hardware | Biannually |
| Weatherproofing | Annually |
| Seasonal Adjustments | As Needed |
By complying with these guidelines and developing a regular maintenance routine, you can guarantee that your recovered timber door continues to be a sensational and useful aspect of your home for years to come.
FAQs on Wood Door Restoration Techniques
What is the first step in restoring a wood door?
The first step in restoring a wood door is to assess its condition. This involves examining the door for visible damage such as cracks, holes, and surface wear. Documenting your findings through notes and photographs can help you stay organized throughout the restoration process.
What tools are essential for wood door restoration?
Essential tools include screwdrivers, hammers, nails, wood chisels, sandpaper, electric sanders, wood fillers, putty knives, wood glue, clamps, and various finishing supplies like wood stain, sealant, primer, and paint. Safety gear such as goggles, dust masks, and work gloves are also crucial.
How do I remove an old finish from a wood door?
You can remove an old finish using a chemical stripper or a heat gun. Apply the chemical stripper according to the manufacturer’s instructions and scrape off the old finish with a putty knife. If using a heat gun, work in small sections to avoid scorching the wood.
What type of filler should I use for cracks and holes in a wood door?
For small cracks and holes, a high-quality wood filler or putty is suitable. For more extensive damage, an epoxy-based filler offers greater strength and durability. Ensure the filler is compatible with the type of wood and the finish you plan to apply.
What are the key steps in sanding a wood door?
Start with coarse grit (60-80) sandpaper to remove old finishes and rough patches. Progress to medium grit (120-150) for smoothing, and finish with fine grit (220-320) for a polished surface. Always sand in the direction of the wood grain to avoid scratches.
How do I choose between painting and staining my wood door?
Consider the desired aesthetic and the condition of the wood. Painting offers a solid, opaque finish and can cover imperfections, while staining enhances the natural grain and provides a more durable finish. Environmental exposure and wood type are also factors to consider.
How often should I reapply the finish to my wood door?
Reapply a protective finish, such as a wood sealant or varnish, every 2-3 years, especially in areas exposed to direct sunlight or harsh weather conditions. This helps preserve the door’s look and protect it from moisture and UV damage.
What maintenance steps are necessary to keep a restored wood door in good condition?
Regular cleaning, periodic inspections, reapplying finish, lubricating hardware, weatherproofing, and making seasonal adjustments are essential maintenance steps. Establishing a maintenance schedule can help you stay on top of these tasks.
Can I use a heat gun instead of a chemical stripper to remove old finishes?
Yes, a heat gun can be used to remove old finishes more quickly than sanding alone. However, it requires caution to avoid scorching the wood. Work in small sections and keep the heat gun moving to prevent damage.
What are the benefits of using a moisture meter during wood door restoration?
A moisture meter helps assess the moisture content of the wood, ensuring it is dry enough for staining or painting. This can prevent future issues such as warping or finish deterioration.
References
- This Old House, “How to Restore a Wood Door”, https://www.thisoldhouse.com/doors/21017518/how-to-refinish-a-door
- Family Handyman, “How to Refinish a Wood Door”, https://www.familyhandyman.com/project/how-to-refinish-a-wood-door
- Bob Vila, “How to Refinish a Wood Door”, https://www.bobvila.com/articles/how-to-refinish-a-door
- Home Depot, “How to Restore Wooden Doors”, https://www.homedepot.com/c/ah/how-to-refinish-a-door/9ba683603be9fa5395fab901207fe77
- Wood Magazine, “Wood Door Refinishing Tips”, https://www.woodmagazine.com/materials-guide/finishes/how-to-refinish-a-door
- DoItYourself, “Wood Door Refinishing and Restoration”, https://www.doityourself.com/stry/restoring-wooden-doors
- The Craftsman Blog, “How to Strip and Refinish Wood Doors”, https://thecraftsmanblog.com/how-to-strip-and-refinish-wood-doors
- Fine Woodworking, “Restoring a Wooden Door: Step-by-Step Guide”, https://www.finewoodworking.com/project-guides/finishing/how-to-refinish-a-door
- DIY Network, “How to Refinish Wood Doors Like a Pro”, https://www.diynetwork.com/how-to/maintenance-and-repair/repairing/how-to-refinish-a-door
- This Old House, “Repairing and Restoring Wooden Front Doors”, https://www.thisoldhouse.com/21018023/how-to-repair-a-wood-door
- Old House Journal, “How to Refinish Old Wood Doors”, https://www.oldhouseonline.com/repairs-and-how-to/how-to-strip-and-refinish-wood-doors
- Popular Mechanics, “How to Sand and Stain a Wooden Door”, https://www.popularmechanics.com/home/interior-projects/how-to/a25872/how-to-refinish-wood-door
- Better Homes & Gardens, “Refinishing Wood Doors: Techniques and Tips”, https://www.bhg.com/home-improvement/door/how-to-refinish-wood-door
- Woodworking Network, “Restoration Techniques for Wood Doors”, https://www.woodworkingnetwork.com/wood-finishing/restoration-techniques-wood-doors
- HouseLogic, “How to Refinish and Restore Wooden Doors”, https://www.houselogic.com/organize-maintain/home-maintenance-tips/how-to-refinish-wood-door
- Houzz, “Restoring a Wooden Door: Techniques You Can Use”, https://www.houzz.com/magazine/restoring-an-older-wood-door-tips-and-tricks-stsetivw-vs~154940129