Crafting Handmade Wood Doors: Wood Selection & Techniques
Embark on the journey of crafting handmade wood doors by learning the importance of choosing the right wood. With expert advice on wood selection for both interior and exterior doors, you’ll make informed decisions for aesthetics and durability.
From essential tools and materials to step-by-step guides on designing, cutting, shaping, assembling, and finishing handmade wood doors, this article provides a comprehensive resource. Whether you’re a beginner or a seasoned woodworker, the tips and techniques from the reputable wood door manufacturers shared here will help you create stunning and long-lasting wood doors with ease.
- importance of choosing the right wood
- Recommended wood types for exterior and interior doors
- Essential tools and materials for crafting doors
- Key steps in designing a handmade wood door
- Techniques for cutting and shaping wood
- Tips for assembling a wood door
- Steps for sanding and staining a wood door
- Proper installation of hardware on a wood door
- Maintenance tips for the longevity of wood doors
Picking the Right Wood for Handmade Wood Doors
When starting the journey of crafting handmade wood doors, one of the most important choices you’ll have to make is picking the best sort of wood. The option of wood dramatically affects the door’s aesthetic appeal, durability, and capability. Right here, I will share my competence to help you make an informed decision.
Firstly, take into consideration the ecological conditions where the door will be set up. If the door is planned for an outside setting, you’ll require wood that can withstand the elements. On the other hand, for indoor doors, aesthetic considerations might take precedence over sturdiness.
Types of Wood for Outside Doors
For exterior doors, you desire wood that is immune to dampness, bugs, and degeneration. The following kinds are highly recommended:
| Wood Types | Characteristics | Pros | Disadvantages |
|---|---|---|---|
| Mahogany | Dense, long-lasting, with a reddish-brown color | Excellent weather condition resistance, sophisticated look | Expensive, hefty |
| Teak | Golden-brown, very resilient, natural oils | Highly resistant to rot and pests | Extremely expensive, minimal availability |
| Cedar | Light-weight, fragrant, reddish shade | Resistant to insects and degeneration, cost-effective | Softer, can dent easily |
| Oak | Solid grain pattern, readily available in red and white varieties | Resilient, conveniently available, and aesthetically pleasing | Prone to contorting if not appropriately dealt with |
Wood Types for Interior Doors
Interior doors permit a more comprehensive array of wood selections, typically focusing much more on aesthetic allure and cost-effectiveness.
| Wood Type | Qualities | Pros | Cons |
|---|---|---|---|
| Cherry | Rich, reddish-brown color that dims in time | Beautiful grain, easy to collaborate with | Reasonably pricey, can scratch quickly |
| Maple | Light color, smooth grain | Hard and sturdy, fairly budget-friendly | It can be challenging to discolor evenly |
| Birch | Light yellow to white shade, fine grain | Economical, easy to paint or discolor | Less sturdy and susceptible to warping |
| Pine | Softwood, yellow-colored shade | Very budget-friendly, very easy to deal with | Less long-lasting and susceptible to damages and scrapes |
When choosing wood, additionally, think about the grain pattern and shade. These elements can dramatically affect the visual allure of the door. For a standard, timeless appearance, woods like mahogany and oak are superb choices. For a more contemporary design, you may choose maple or birch.
Another variable to consider is the wood’s workability. Some woods are harder and a lot more challenging to reduce and shape, which can impact your task’s total complexity. For newbies, woods, like yearn and cedar, are much easier to manage, whereas even more seasoned woodworkers might choose the challenge of hardwoods like oak and mahogany.
Ultimately, constantly guarantee the wood you select is morally sourced and has undergone correct drying and treatment processes. This will ensure a long life and gradually preserve the door’s stability.
Crucial Tools and Materials for Wood Door Crafting
Crafting a handmade wood door requires a well-balanced selection of vital tools and materials. The high quality of these devices and products considerably influences the final product, guaranteeing that the door is not only cosmetically pleasing but likewise long-lasting and practical.
Wood Option
The most important consideration is the option of wood. Hardwood species such as oak, mahogany, cherry, and walnut are popular due to their toughness, sturdiness, and eye-catching grain patterns. Softwoods like pine and cedar are also made use of, especially for their simplicity, workability, and cost-effectiveness. The choice of wood will affect the door’s appearance, toughness, and viability for various environments.
Hand Devices
Hand tools are vital in the crafting process, enabling accuracy and control. Several of the crucial hand tools include:
- Blades: Vital for thorough carving and shaping.
- Hand saws: Utilized for cutting wood to the preferred size.
- Planes: are critical for smoothing and flattening wood surface areas.
- Wood rasps and files: Perfect for refining edges and detailed work.
- Mallets: Made use combined with chisels for controlled sculpting.
Power Devices
While hand tools supply accuracy, power tools provide effectiveness and simplicity, particularly for bigger projects. Important power devices include the following:
- Table saws: are suitable for making direct, precise cuts promptly.
- Band saws: are perfect for cutting curves and complex forms.
- Routers: Utilized for burrowing a location in the wood, critical for creating joints and decorative sides.
- Drills are needed for making holes for hardware and dowels.
- Orbital sanders are crucial for preparing the wood surface area before completion.
Materials
Along with wood, numerous materials are needed to build a handmade wood door. These include:
- Wood glue: a solid adhesive for signing up with items of wood firmly.
- Wood screws and nails: utilized for setting up the door and affixing equipment.
- Sandpaper, available in different grits, is vital for smoothing surfaces and sides.
- Spots and finishes: These supply defense to the wood and enhance its all-natural elegance. Choices consist of oil-based, water-based, and lacquer surfaces.
- Hardware: Consists of joints, takes care of, and locks, picked based upon both functionality and visual allure.
The ideal mix of devices and products is crucial to the effective crafting of handmade wood doors. Each device and material has a certain function, adding to the door’s overall quality and appearance. Recognizing and choosing the appropriate resources is the structure of any woodcraft job, setting the stage for a perfectly crafted last item.
Step-by-Step Guide to Designing Your Door
Designing handmade wood doors is a detailed procedure that calls for focus on detail and a clear understanding of your preferred outcome. This overview will certainly walk you through each action to ensure your design is both practical and aesthetically pleasing.
1. Establish the Function and Design of the Door
Before diving right into the design specifics, it’s crucial to determine the purpose of the door. Is it for an interior or external application? This choice will certainly influence the option of wood, finish, and general layout. Consider the building style of your home or building to ensure the door complements its surroundings.
2. Measure the Door Opening
Precise measurements are necessary for an appropriately fitting door. Determine the height, size, and thickness of the door opening. Keep in mind any abnormalities in the structure that might need to be attended to. These measurements will form the basis of your door design.
| Measurement | Conventional Dimensions (in inches) | Customized Capacities |
|---|---|---|
| Elevation | 80 | ______ |
| Width | 32 | ______ |
| Thickness | 1.75 | ______ |
3. Sketch Your Design
Create a detailed sketch of your door design, including measurements and decorative elements. Use chart paper or a digital-style tool for accuracy. This sketch must consist of the design of panels, home windows, and any other features, such as makings or moldings.
4. Select Wood Species and Grade
Selecting the ideal wood is vital for both appearance and toughness. Typical wood types for doors consist of oak, mahogany, and cherry. Each species has distinct characteristics, such as grain pattern and solidity, which must align with your design objectives. Select a top-notch quality of wood to ensure a smooth coating and lasting efficiency.
| Wood Types | Features |
|---|---|
| Oak | Solid, durable, and famous grain |
| Mahogany | Rich shade, smooth grain, resistant to degeneration |
| Cherry | Cozy shade, great grain, ages beautifully |
5. Strategy The Joinery
The kind of joinery you pick will affect the door’s stamina and appearance. Common joinery techniques for wood doors include mortise and tenon, dowel joints, and biscuit joints. Ensure your design includes proper joinery for the door’s planned use and the wood varieties chosen.
6. Consider Insulation and Soundproofing
For exterior doors, insulation and soundproofing are important considerations. Incorporate products such as foam or fiberglass into your layout to enhance energy effectiveness and minimize noise transmission. These products can be concealed within the door’s building and construction to maintain its visual charm.
7. Finalize the Layout
Evaluate all elements of your layout to guarantee precision and efficiency. Validate measurements, confirm the option of products, and double-check the joinery details. This final action is essential to avoid any concerns during the building phase.
By adhering to these steps, you can develop a thorough and effective design for your handmade wood doors, setting a solid foundation for the crafting procedure.
Strategies for Cutting and Shaping Wood
Crafting a handcrafted wood door begins with understanding the techniques for reducing and forming wood. These techniques are crucial for achieving specific dimensions and guaranteeing the architectural integrity and aesthetic allure of the door. The complying with approaches detail the procedure and factors to consider for each step.
Recognizing Wood Grain and Quality
Before reduction, it is crucial to comprehend the wood grain and its buildings. The instructions of the grain influence just how the wood will respond to cutting and shaping. Dealing with the grain can prevent splintering and guarantee smoother cuts. Recognizing knots and other abnormalities in the wood is likewise crucial, as these can impact the cutting procedure and the appearance of the door.
Utilizing the Right Equipment
For cutting wood, devices such as table saws, miter saws, and band saws are essential. Each device offers a certain purpose:
- Table saws give straight, precise cuts for big pieces of wood.
- Miter saws are ideal for angled cuts and creating accurate joints.
- Band saws offer convenience in reducing curves and irregular shapes.
Preserving sharp blades and calibrating your tools frequently ensures tidy cuts and minimizes the threat of errors.
Determining and Noting
Accurate dimensions are the foundation of any successful woodcraft project. Using tape action, square, and marking devices, carefully procedure and mark your cuts on the wood. Confirming measurements before reducing can save time and products. It’s typically beneficial to utilize a marking gauge for constant, identical lines.
Cutting Methods
Begin with rough cuts to break down big items of wood into even more manageable sizes. Then, move to finer cuts, following your accurate dimensions:
- Slit cuts include cutting along the grain of the wood and are best performed with a table saw.
- Cross cuts are made throughout the grain and are generally done with a miter saw.
- Rounded cuts call for using a band saw or jigsaw, depending on the complexity of the contour.
When making complex cuts, use a router with suitable bits to add ornamental edges or inlays.
Shaping Techniques
Shaping the wood involves fine-tuning the cut items to match the style specifications of the door. This can be done using different devices:
- Hand airplanes smooth and squash the wood surfaces.
- Chisels take joints and intricate information.
- Rasps and files aid in fine shaping and smoothing of sides.
Sanding is the last action in shaping, making sure all surfaces are smooth and free of rough edges. Begin with crude-grit sandpaper and progress to finer grits for a refined finish.
Safety and Security Considerations
Always focus on security when reducing and forming wood. Use protective equipment such as safety glasses, ear protection, and dirt masks. Ensure that your workspace is well-ventilated and that you adhere to the correct security procedures for using power tools.
By grasping these cutting and shaping techniques, you lay a strong foundation for crafting lovely, resilient handmade wood doors.
Assembling Your Handmade Wood Doors
As soon as you have meticulously prepared all the individual components of your door, the next critical action is setting up these parts to create a strong and visually pleasing handmade wood door. This process calls for precision and patience to guarantee that all items mesh completely and the end product is both practical and lovely.
1. Laying Out the Elements
Begin by setting out all the pieces of your door on a flat, secure surface area. This consists of the stiles (vertical pieces), rails (straight items), and any type of panels or decorative components. Ensure that each piece is reduced to the specific dimensions needed and check for any imperfections or warping that might affect the setting-up procedure.
2. Dry Fitting
Before applying any type of sticky, execute a completely dry fit to make sure that all pieces align correctly. This action helps identify any adjustments that might be needed and confirms that the joinery strategies you’ve picked will certainly create a tight fit. Adjust as essential, fining sand or trimming pieces to achieve the best fit.
3. Using Adhesive
As soon as you are pleased with the dry fit, dismantle the elements and apply wood adhesive to the joints. Use a high-quality wood glue designed for the sort of wood you are using. Make certain to use a generous yet not too much adhesive, spreading it equally across the joint surface areas.
4. Clamping the Door
After using the adhesive, reconstruct the door and utilize clamps to hold the items strongly in place. Clamping ensures that the joints are tight and the glue can be set correctly. Leave the door secured for the recommended time specified by the glue manufacturer, normally 24 hours, to achieve maximum toughness.
5. Checking for Square
While the adhesive is drying out, it is crucial to ensure that the door is square. Utilize a woodworker’s square to confirm that all edges are at 90 degrees. If modifications are needed, do so before the adhesive is completely set.
| Component | Dimension | Notes |
|---|---|---|
| Stiles | 6 feet | Guaranteed directly and warp-free |
| Rails | 3 feet | Suit size to stiles |
| Panels | Varies | Custom-made style aspects |
6. Enhancing Joints
For additional strength, take into consideration making use of dowels, biscuits, or screws at vital joints. These supports can help guarantee the durability and longevity of the door, especially in high-use areas.
7. Examining the Assembled Door
When the glue has dried out and the clamps are removed, meticulously inspect the door for any type of spaces or misalignment. Sand any type of rough edges and guarantee that all joints are safe. At this stage, you can likewise make any last adjustments before proceeding to the finishing touches.

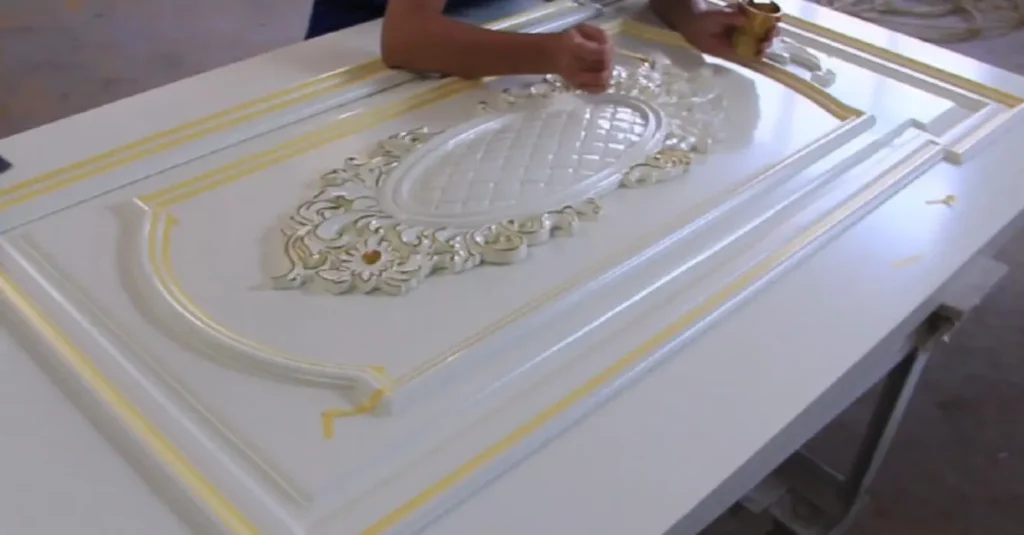
Ending Up Touches: Sanding and Staining
In the procedure of crafting handmade wood doors, the finishing touches of sanding and staining are important for attaining an expert and visually pleasing result. These actions not only enhance the natural elegance of the wood but also provide a safety layer that expands the door’s durability.
Fining Sand
Sanding is a vital action that guarantees the wood surface is smooth and free of blemishes. Begin with coarser grit sandpaper, such as 80-grit, to remove any kind of harsh spots, tool marks, or unequal locations. Progressively progress to finer grits, like 120-grit and afterward 220-grit, to attain a smooth surface. It is necessary to sand in the direction of the wood grain to avoid scrapes and ensure a uniform surface area.
Utilizing a fining sand block or an orbital sander can make this job easier and much more efficient. Pay special attention to edges, as these areas can commonly be ignored yet are critical for a cohesive coating. After the first sanding, clean the surface with a tack fabric to get rid of any dust and particles before going on to finer sanding.
Tarnishing
Once sanding is complete, discoloration is the next step to bring out the wood’s all-natural charm and provide a rich shade. Select a stain that matches the wood types you are collaborating with. Evaluate the tarnish on a tiny, inconspicuous area of the door to guarantee it produces the desired color. Spots can vary significantly depending on the kind and condition of the wood, so this action is important.
Use the tarnish to make use of a tidy, lint-free towel, foam brush, or paintbrush. Job in manageable sections, and apply the discolor to the wood grain. Allow the discoloration to permeate the wood for the recommended time defined by the producer, generally ranging from a few minutes to 15 minutes. The longer the tarnish is left on, the deeper the color will be. Clean off any kind of excess tarnish with a tidy fabric to avoid blotchiness and guarantee an even surface.
Final Sanding and Leading Layer
After the stain has dried out completely, which may take 24 hours or even more, carry out a last light sanding with very fine sandpaper, such as 320 grit, to get rid of any raised grain and smooth the surface area additionally. Clean down the door with a tack towel to get rid of any type of sanding dirt.
The final action is to apply a top layer to safeguard the discolored wood and improve its longevity. Options for leading coats include polyurethane, varnish, or a clear lacquer. Each of these surfaces has its very own advantages, yet they all offer to protect the wood from dampness, scrapes, and various other ecological factors. Use the top layer in slim layers, allowing each layer to completely dry extensively before applying the following. Usually, a couple of coats suffice for a long-lasting coating.
Appropriate sanding and staining are not merely regarding looks; they have to do with protecting the honesty and beauty of the handmade wood doors for many years to come. By paying attention to these details, you make certain that your handmade item stands out and endures the test of time.
Putting Up Equipment for Feature and Visual appeal
When it comes to mounting hardware on your handcrafted wood door, the double purposes of functionality and appearance need to be taken into consideration. The ideal hardware not only makes sure the door operates efficiently but also enhances the general style.
First, choose the ideal type of hardware. This includes hinges, manages, locks, and any type of added fixtures. For hinges, take into consideration the weight and density of your door. Heavy doors call for sturdier hinges, such as ball-bearing hinges, to guarantee smooth operation and toughness.
| Hardware Type | Recommended Material | Factors to consider |
|---|---|---|
| Hinges | Brass, Stainless-steel | Weight of the door, Deterioration resistance |
| Manages | Brass, Bronze | Design, Reduce of grip |
| Locks | Steel, Brass | Protection degree, Kind (deadbolt, mortise) |
| Additional Components | Differs | Layout compatibility and resilience |
Begin the installment by noting the settings for your rest on both the door and the structure. Usually, you will require three hinges for a standard door, spaced uniformly along the side. Use a sculpt to produce recesses for the joints so that they sit flush with the surface area of the door and the structure. Safeguard the joints with screws, guaranteeing they are firmly attached to avoid any type of activity.
Next, install the door handle and lock. The placement of these components is important for comfort and protection. The standard elevation for a door manager is around 36 inches from the flooring. Drill holes according to the template supplied with your hardware, ensuring accurate positioning. Fit the deal with and lock components into the openings and safeguard them with screws.
For extra components such as door knockers, peepholes, or attractive components, take action and mark the desired locations meticulously. Use proper devices to mount these items, guaranteeing they are both safe and aesthetically lined up with the door’s design.
The final step in equipment setup is to check the positioning and procedure of the door. Make sure that the door swings efficiently on its hinges, which are taken care of and secured to operate without blockage. Modifications might be necessary to best fit and function.
Keep in mind that the quality and appearance of the hardware you select can dramatically enhance the beauty and capability of your handmade wood doors. Investing effort and time in picking and installing the right pieces will pay off in both efficiency and aesthetic appeal.
Upkeep Tips for Longevity of Wood Doors
Keeping the durability of handmade wood doors requires regular care and interest. The all-natural charm of wood makes these doors a classic option; however, they are vulnerable to ecological factors and daily wear. Here are some crucial suggestions to ensure your wood doors stay in superb condition for many years to come.
Regular Cleaning up
To maintain the look and integrity of your wood door, regular cleaning is critical. Use a soft towel or sponge with light soap and water to gently cleanse the surface. Stay clear of severe chemicals that can harm the wood coating. Make sure the door is completely dry after cleansing to stop dampness absorption, which can cause warping or swelling.
Protective Coatings
Using a protective layer is important for guarding wood doors. Use premium sealants or varnishes made for outside or indoor use, depending on the door’s placement. Reapply these coatings every 1-2 years or as suggested by the supplier to preserve their efficiency.
Climate Stripping
For external wood doors, setting up climate stripping can help secure against wetness, drafts, and temperature fluctuations. Correct climate stripping not only improves power effectiveness but also expands the door’s life expectancy by reducing direct exposure to severe weather.
Examining for Damage
Frequently examine your wood doors for any type of sign of damage, such as cracks, chips, or fading. Early discovery of these issues allows for prompt repair services, stopping additional wear and tear. Fill any type of small ssplit with wood filler and sand smooth before applying a fresh layer of paint or stain.
Correct Usage
Appropriate use and handling of wood doors can considerably influence their long life. Avoid pounding doors, which can loosen joints and cause structural damage with time. Guarantee that door equipment, such as joints and handles, is firmly attached and working correctly.
Moisture Control
Wood is delicate to changes in moisture degrees. In atmospheres with high moisture, make use of a dehumidifier to keep interior conditions secure and stop wood from expanding or getting wet. For dry climates, think about utilizing a humidifier to prevent the wood from drying and breaking.
Re-Staining and Refinishing
With time, the coating on wood doors might fade or become damaged. Re-staining and refinishing your door can restore its original charm. Sand the door to get rid of the old finish, and after that, apply a new discolor and safety sealant. This procedure not only improves the door’s look but also adds an added layer of security.
Seasonal Upkeep
Conduct seasonal upkeep to address the specific difficulties posed by different climate conditions. In winter, make certain that doors are correctly insulated and free from ice or snow buildup. Throughout summer, look for indicators of sun damage and reapply UV-protective surfaces as required.
| Maintenance Task | Frequency | Notes |
|---|---|---|
| Cleaning up | Regular monthly | Use mild soap and water |
| Using Safety Coatings | Every 1-2 years | Use proper sealants |
| Inspecting for Damage | Quarterly | Address splits and chips immediately |
| Re-Staining and Refinishing | Every 3–5 years | Restore appearance and security |
By following these upkeep tips, you can maintain the natural appeal and capability of your handmade wood doors. Normal care not only boosts the door’s aesthetic charm but also ensures its longevity, offering you a lasting and stylish entrance to your home.
FAQs about Crafting Handmade Wood Doors
What is the importance of choosing the right wood for handmade doors?
Choosing the right wood is crucial, as it significantly influences the door’s aesthetics, durability, and functionality. The choice of wood should consider environmental conditions and whether the door will be used indoors or outdoors.
What are some recommended types of wood for exterior doors?
Recommended types of wood for exterior doors include Mahogany, Teak, Cedar, and Oak. These woods are known for their resistance to moisture, insects, and decay, making them ideal for outdoor use.
What are some recommended types of wood for interior doors?
For interior doors, cherry, maple, birch, and pine are popular choices. These woods offer a range of characteristics and aesthetics suitable for interior applications.
What are some essential tools and materials needed for crafting handmade wood doors?
Essential tools include chisels, hand saws, planes, wood rasps, and mallets. Materials needed include wood glue, wood screws and nails, sandpaper, stains and finishes, and hardware such as hinges and handles.
What are some key steps in designing a handmade wood door?
Key steps in designing a handmade wood door include determining the purpose and style of the door, measuring the door opening, sketching the design, selecting wood species and grade, planning the joinery, considering insulation and soundproofing, and finalizing the design.
What are some techniques for cutting and shaping wood for handmade doors?
Techniques for cutting and shaping wood include understanding wood grain and properties, using the right tools such as table saws and chisels, measuring and marking accurately, making different types of cuts, shaping with hand planes and chisels, and prioritizing safety.
What are some tips for assembling a handmade wood door?
Tips for assembling a handmade wood door include laying out the components, dry fitting before gluing, applying wood glue generously, clamping the door securely, checking for square, reinforcing joints if necessary, and inspecting the assembled door for gaps or misalignments.
What are the steps for sanding and staining a handmade wood door?
The steps for sanding and staining a handmade wood door include starting with coarse grit sandpaper, progressing to finer grits, applying stain in the direction of the grain, finally sanding with very fine sandpaper, and applying a top coat for protection and durability.
How can I properly install hardware on a handmade wood door?
To properly install hardware on a handmade wood door, choose the appropriate type of hardware, mark positions carefully, install hinges, handles, locks, and additional fixtures, check alignment and operation, and ensure that the door swings smoothly and securely.
What are some maintenance tips for ensuring the longevity of wood doors?
Maintenance tips for wood doors include regular cleaning with mild soap and water, applying protective coatings every 1-2 years, installing weather stripping for exterior doors, inspecting for damage quarterly, proper usage and handling, controlling humidity levels, re-staining and refinishing every 3-5 years, and conducting seasonal maintenance.